
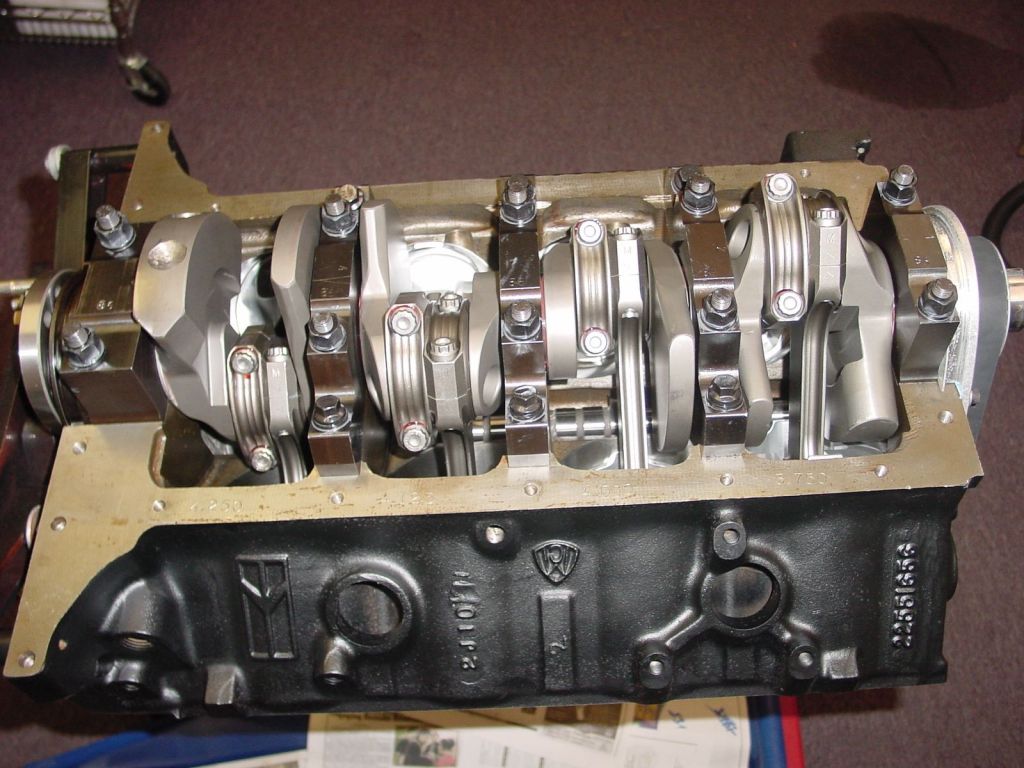
Assembled shortblock
September 9th
Finally the motor is going together and should be done by the end of the month...... if all goes well. Below are some images of the motor in it's current state. The following few paragraphs describe some of the problems we encountered during the buildup. If you ever consider building an SB2 motor(or any Nascar spec motor), be forewarned, it is not easy. Very few people know much about them and parts are not easily obtainable. Everything is custom and most parts will not interchange with your typical small block Chevrolet. We chose to run a Rocket block which, basically is GM's most durable "streetable" block built. Had we known the difficulties in advance, we probably would have sacrificed a little strength and went with a GM SB2 Bowtie block instead.
The Rocket block comes with a wide oil pan rail and raised camshaft location for running large stroke crankshafts. The wide panrail wasn't too much of an issue, Canton made a dry sump oil pan that fits, but the raised cam gave a few problems down the road. Since we used engine parts built for Nascar, almost everything was custom. Our crankshaft came with a big block sized balancer shaft which meant that our belt drive system would have to be special in two ways: a larger big block sized crank sprocket and a longer belt for the raised cam location. After checking around, we decided on the new Comp Cams belt drive system. Unfortunately the kit for our application had not been thoroughly tested yet and, after attempting to install it, we realized that it was not going to work with the larger dampener snout. Currently Comp Cams is attempting to redesign this particular kit and will either refine the part number or discontinue it depending on their results. In the meantime, we went with a Jesel belt drive kit and everything installed perfectly. Thank you Jesel.
The next issue arose when we attempted to have custom, low compression pistons made. The SB2 motor was never intended to have low compression and the heads have a very small combustion chamber which requires a very deep dished piston. The crank and rod combination that we purchased is an odd stroke and requires a high wrist pin location in the piston. With a low compression dish and a high pin location, it looked as if our bottom ring was going to intersect the wrist pin bore. Luckily BRC solved our problem and custom built us a set of billet 8.5:1 pistons with the bottom ring groove less than 1 mm from the top of the wrist pin.
At this point we thought we had the shortblock conquered and began to assemble it. When it came time to press cam bearings in, it was noticed that the cam bore was the wrong size. The bore was larger than traditional small blocks use but smaller than big block bearing dimensions. Apparently these blocks come bored undersize to allow for various cam bearing diameters and require a final bore before assembly. Needless to say, a special boring bar was required to perform this and the machine shop(A&S Motorsports) was nice enough to buy it specifically for this job($1500 used, ouch!). But wait, it gets better. After finally figuring out the cam bearing issues, the bearings were installed and the shortblock assembled. "After" assembling the motor, it was noticed that the lifter bores were sized for smaller, Ford lifters. Since this was a Nascar block with no official GM numbers(this block does not exist according to GMPP), we came to the conclusion that it was probably a prototype block used for testing by one of the teams. Since there was no such thing as a compatible, Ford sized roller lifter with an offset pushrod cup(see below paragraph), the motor was disassembled and the lifters were bored to the correct size.
|
|
|
|
|
Assembled shortblock
|
There were various other problems encountered in building the short block but let me move on to the heads and valvetrain before you get too bored(If you were already bored, don't even bother with the rest, it only gets worse). Once we set the heads onto the motor, it was obvious that something was seriously wrong. With the valvetrain that was on the heads, the exhaust pushrods would have actually had to go through the water jackets in order to sit into the lifter cups. After a few calls to Comp Cams and Jesel, it was determined that we had rockers and stands made for an SB2 block however our Rocket block is based on a conventional small block. The main difference between the two blocks is in the lifter bore angles. Because the SB2 head uses symmetrical ports, the valvetrain angles are completely different and require the use of angled lifter bores to compensate for the excessive pushrod angles. SB2 blocks have angled lifter bores while the Rocket block uses conventional vertical lifter bores. When SB2 heads are used on a conventional block, custom lifters with offset pushrod cups must be used. We had the correct lifters but it was later determined that the entire rocker arm assembly needed to be replaced including the stands. On our first attempt at getting the correct geometry, we were misinformed and wasted $650. Jesel told us that, based on the part numbers that were on our existing parts, all we needed to get were new exhaust rockers with a different offset and they would line up. Since SB2 valvetrain is so specific, Jesel only builds them when they have sufficient quantities on order and they are not refundable once purchased. 6 weeks later we got our new rockers but they did not fix the problem. Jesel claims that we have an odd setup and could not provide an explanation, nor would they provide a refund. At this point, we did not know what to do so we called the only other people that make rockers for this setup - T & D Machine. They were very knowledgeable and told us that the entire setup was wrong and we needed to change rocker arm ratios, offsets and stands to work correctly with the Rocket block. While this sounded like a sales pitch, I was willing to try it because at this point I had no other options. After insuring that a refund was possible in the case that they did not work, we ordered them. Good news, bad news scenario here. Everything fit perfectly, however the new rocker ratios required that a new cam be ground which meant that the shortblock would have to partially disassembled again. After 3 weeks waiting for a new cam, the short block was reassembled and we were back on track. New valves, valve springs, locks and retainers were purchased, the heads were assembled and this is where we are now.
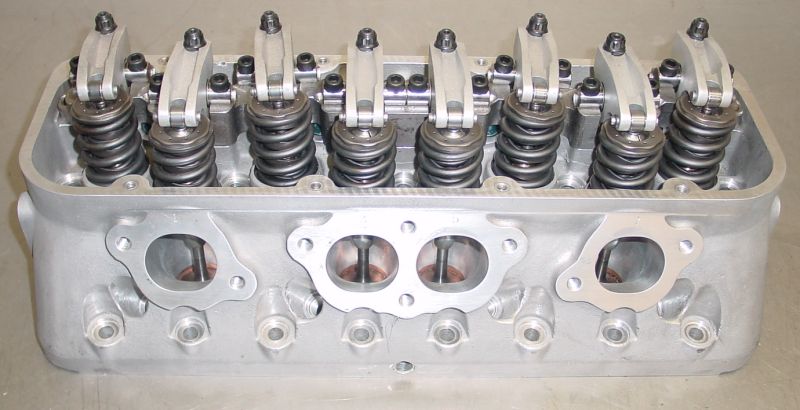 |
Completed SB2 head containing Titanium intake valves,
locks and retainers and Inconel exhaust valves
|
September 26th
1993-1997 F-Body stock brakes were ok for the daily driver but marginal for aggressive driving and certainly not up to the task of 150 mph stops. Of course the parachute will come into play here but we wanted to upgrade the brakes at least to 1998-2002 specs. Not only does this increase the rotor size over an inch but it also utilizes a dual piston, aluminum caliper vs. the pre-98 steel, single caliper design. Basically we had to change the spindles, calipers and mounts, and brake rotors to perform this swap. Also shown in this update is the relocated brake lines and line lock plumbing.
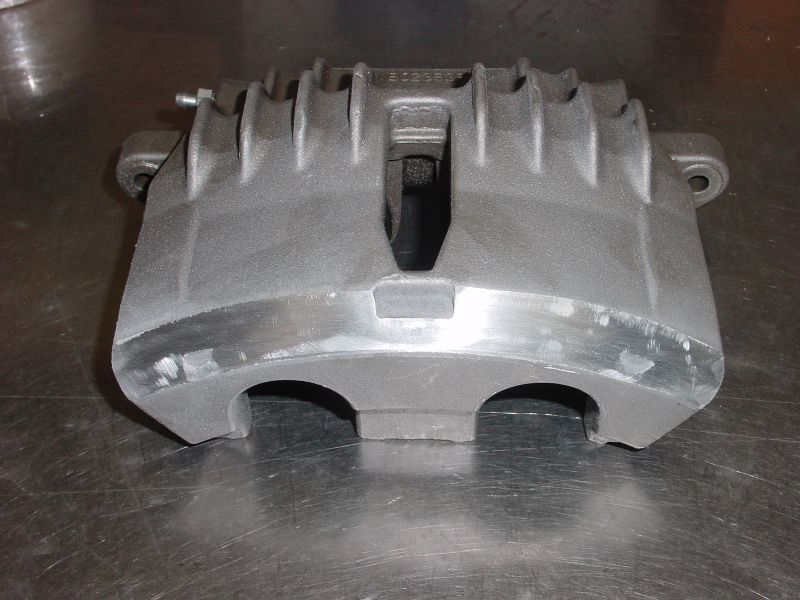 |
Since we will be running 15" drag wheels on the front, it was necessarry to clearance the front calipers. The image to the left shows what was necessarry to gain proper clearance. |
 |
 |
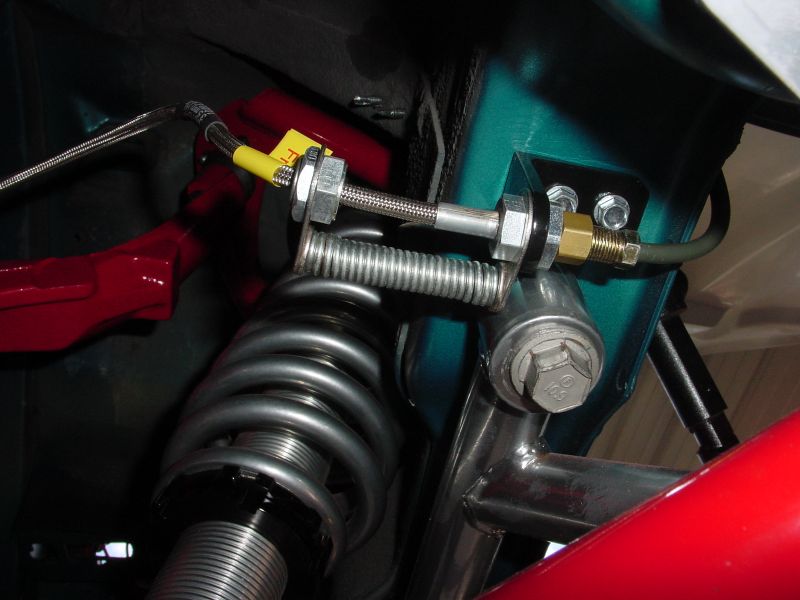 |
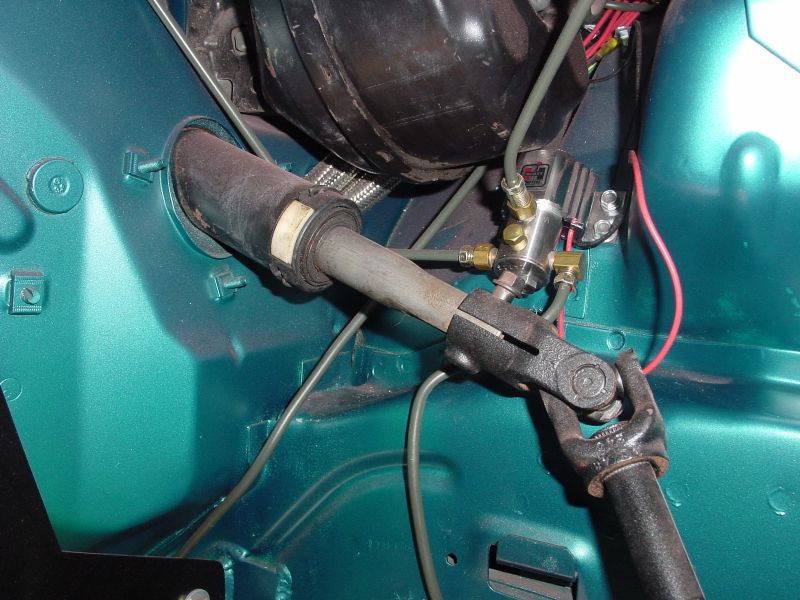
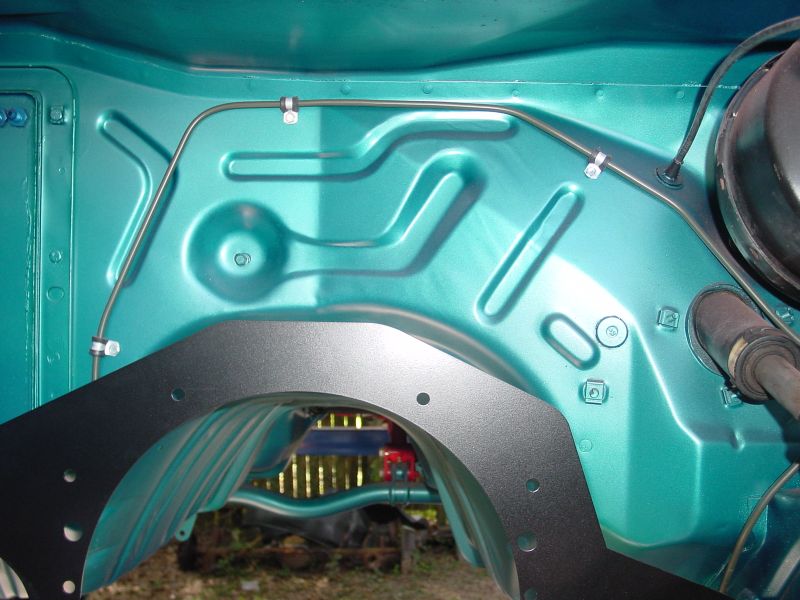
The above images illustrates our brake line relocation. The factory lines cross the car via the K-member however we wanted to be able to remove the k-member without unhooking the brake lines so we routed them across the firewall and moved the rubber brake line mounts to the frame rails. Image 1 shows where we mounted the line lock. Image 2 shows where we ran our passenger brake line across the firewall. Image 3 shows our relocated rubber brake line mounts. Our adjustable proportioning valve is positioned on the other side of the master cylinder not visible in the photo. Baer Eradispeed brake rotors were used with Russel braided brakelines.
 |
 |
|
The finished product!
|
October 16th
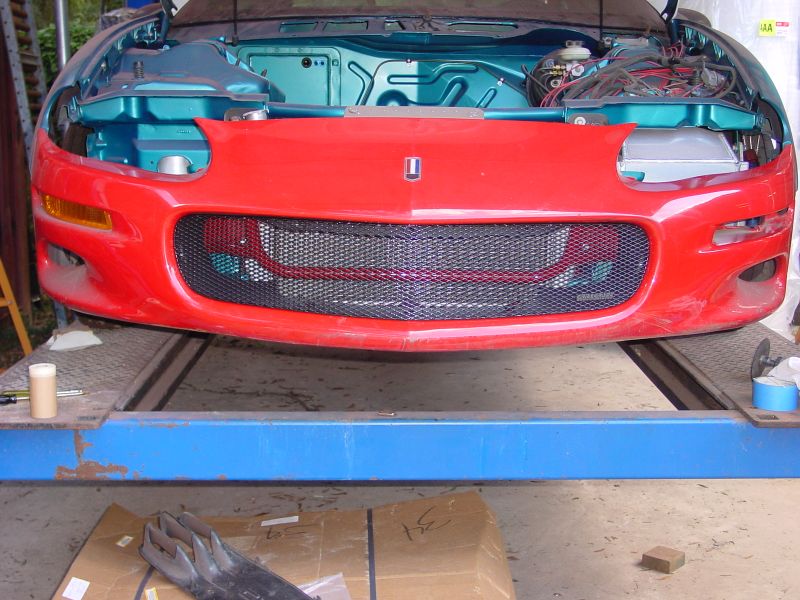
The F-Body is a "bottom feeder" when it comes to radiator airflow. Both the Camaro and Firebird noses do not have a functional grille, instead all airflow used for cooling is directed upward from the front rubber airdam. Since our radiator was relocated in front of the airdam, it became necessary to find other means of cooling. Below are pictures of what was required in order to make our functional grille.
 |
This image shows the radiator mounted forward of where the factory airdam was attached. Setup like this, the radiator gets zero airflow. |
| This image shows where we cut out the factory "simulated" grille to allow direct airflow to the radiator. |
 |
 |
This is the completed modification. The outer area was masked and the area behind the grille was painted black. Then a modified Grille Craft grille was installed to cover the opening. |
GO TO PAGE 1 - 2 - 3 - 4 - 5 - 6 - 7 - 8 - 9