
August 6th
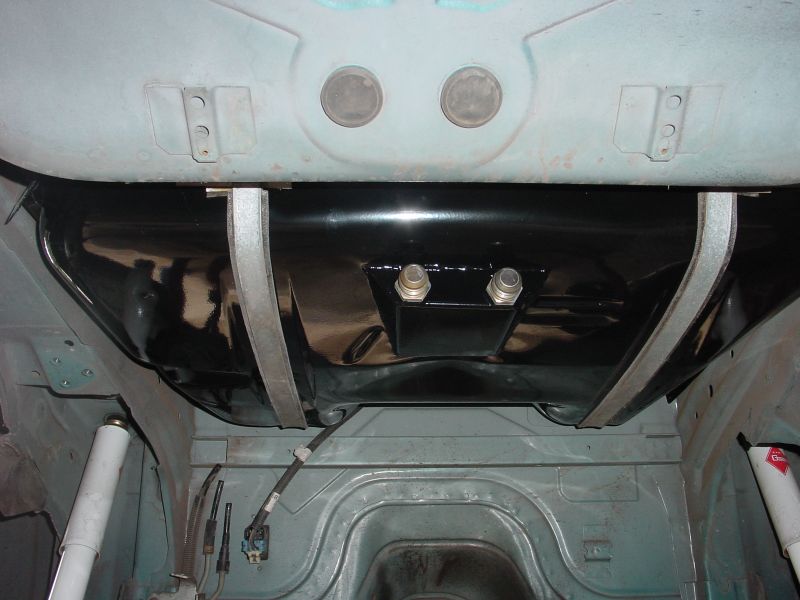
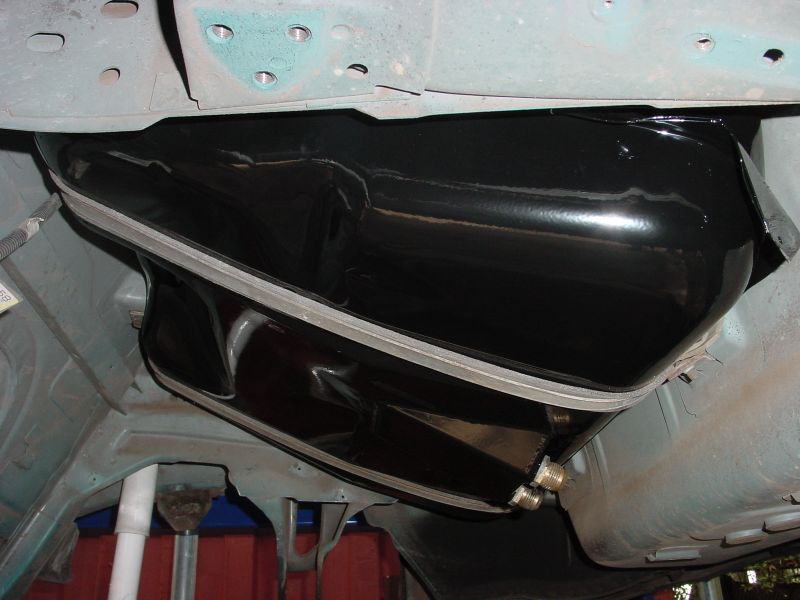
| Although this is a small(and late) update, there are many more soon to follow. We have finally begun working on the car itself and have accumulated most of the major items required to build the car. It was decided to start at the rear of the car and move forward as the motor is being built in the meantime. The gas tank, rear end, and rear suspension were pulled to make way for the upgraded parts. Because the F-Body is a hatchback, most racing sanctions require that a firewall be installed if a fuel cell is used. Since this is to be a street car, I wanted to keep the interior as stock as possible so it was determined to modify the factory fuel tank instead. The tank was removed and a fabricated sump was welded to the bottom with two #12 AN fittings installed(see picture below). The factory fuel pump was removed and the OE fuel and vapor lines were removed and welded up. We also welded a #12 vent tube bung and a #10 return line bung to the top of the tank(not visible in picture). Once the welding was finished, we checked for leaks, bead blasted the tank and then powdercoated it. |
|
|
|
|
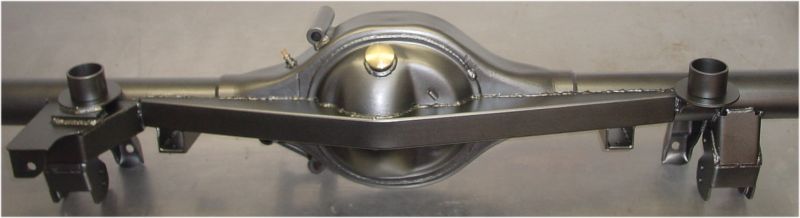 |
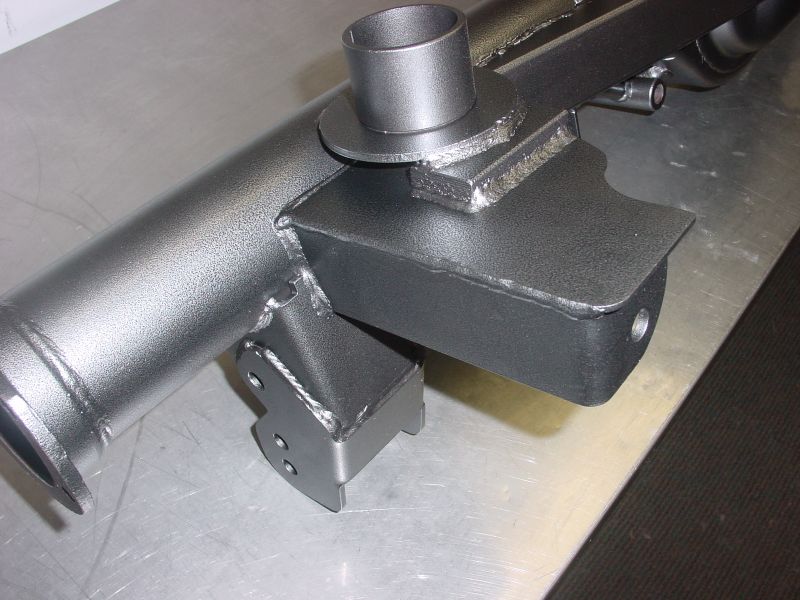
We also installed the rearend in the car to final fit everything before powdercoating. Lowered swaybar mounting pads were welded to the housing to allow the prototype BMR "dragrace anti-roll bar" to be installed. Once everything was test fit, the rear end was powdercoated. This is a new, textured powdercoat color(new for us)called silver vein that looks great on chassis components. Click here to see a closeup image of this color. The next few updates will be installation of the rear-end, brakes, and suspension. |
August 10th
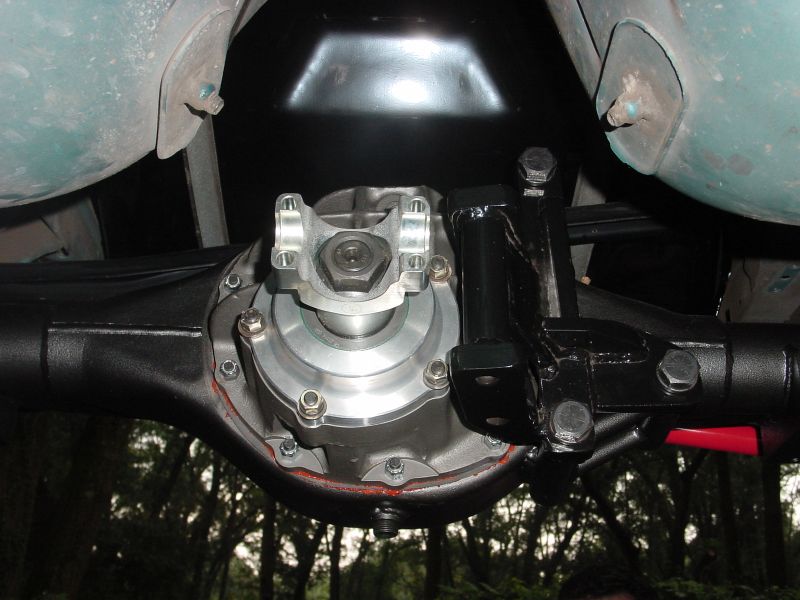 |
The rear end was installed using a set of QA1(formerly Hal) shocks, BMR chrome moly tubular control arms and a chrome moly adjustable panhard rod. Once the center section and axles were installed, a few new problems arose. When the Moser torque arm mount was installed on the rear, it became apparent that the reinforcement ribs on the case of the heavy duty center section interfered with the torque arm mounting bolts. In order to fix this problem, the bracket was removed and the ribs radiused to provide clearance. |
| When this rear end was ordered from Moser, we opted for the standard Ford bearing ends to allow us to use a Wilwood disc brake setup. This option from Moser is priced the same and saves the headaches associated with adapting the stock GM brake hardware to the Ford rear end. The Wilwood kit uses large 2 piece, vented 13" rotors and 4 piston, billet aluminum calipers. This setup is reasonably priced, a snap to install, and fits inside most 15" or larger wheels. |
 |
September 13th
This is another update that really doesn't show physical progress on the car but is critical to the overall plan. While we have been focusing on the rear of the car first, we are still accumulating parts for other areas that come later in the buildup. Below are a few pictures of items that we will be using in later updates to the buildup. Click on any picture to see a high resolution image.
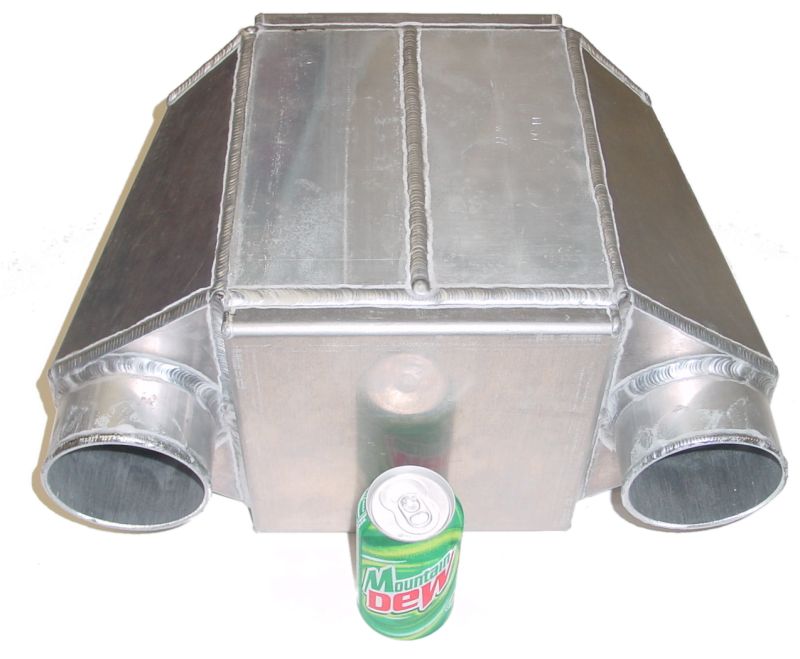 |
This is the Spearco air to water intercooler that we will be using with the T-100 turbo. This particular unit is capable of cooling enough intake air to feed 2000+ horsepower and should be more than sufficient for our useage. A special dedicated remote electric water pump and ice tank is used to circulate chilled water through the intercooler cores. The physical size of this thing is huge and we have yet to determine where in the car it will be installed. |
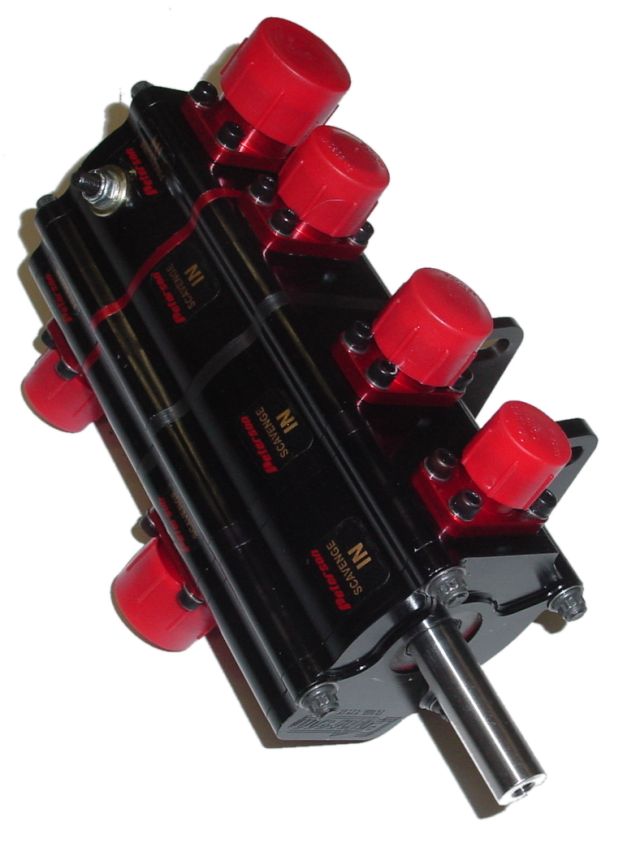
| This is a Peterson 4 stage dry sump oil pump that is necesarry to provide the adequate amount of oil to the turbo and engine. Because the engine being used is generally used for Nascar racing, there is no provision in the engine block for a traditional oil pump. This style pump has multiple scavenge and pressure lines so individual feed lines can be plumbed to direct oil to or scavenge oil from critical components such as specific sections of the motor or the turbocharger itself. One other benefit to running a dry sump system is that it provides negative pressure in the crankcase. Besides aiding gasket seal, this can actually supply additional horsepower by providing better ring seal as well. |
 |
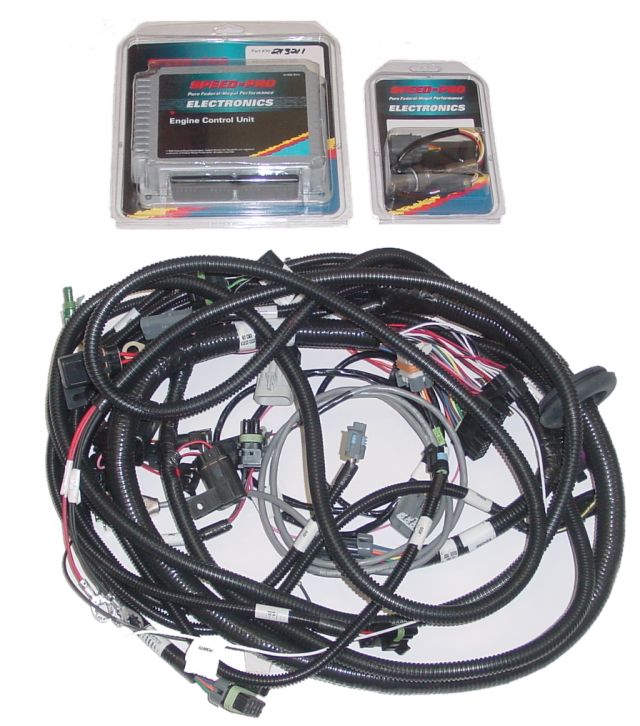 |
While this may not look like much, it is one of the most expensive and critical components in the entire buildup. This is the Speed Pro fuel injection computer and harness and IS one of the main components that makes a 1500 HP streetcar possible. The turbo makes the raw power but the computer controlled injection system tames it. Using a wide band O2 sensor and sequential port fuel injection, this system makes it possible to run a set of 160 lb/hr fuel injectors at a smooth 1000 rpm idle without plug fouling! |
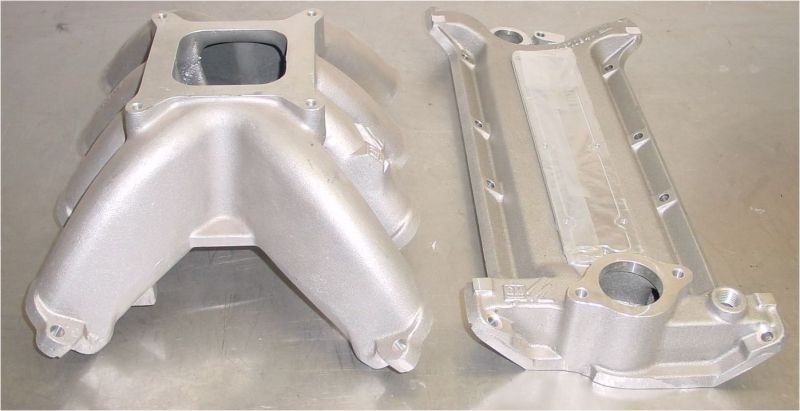
| This is the SB2 intake manifold as it comes from GM Performance Parts. The SB2 design is somewhat different from traditional designs in that it is two pieces(See figure 1). The lifter valley and water ports are sealed by the valley tray and the intake ports seal seperately via the "spider"(upper portion of the manifold). This makes it possible to remove the intake manifold without removing the distributor or emptying the water jackets into the lifter valley. The manifold is currently being port matched and fitted for 160 lb. injectors by Applied Nitrous Technology. Updated pictures will be shown once the manifold is completed. |
|
