November 12th
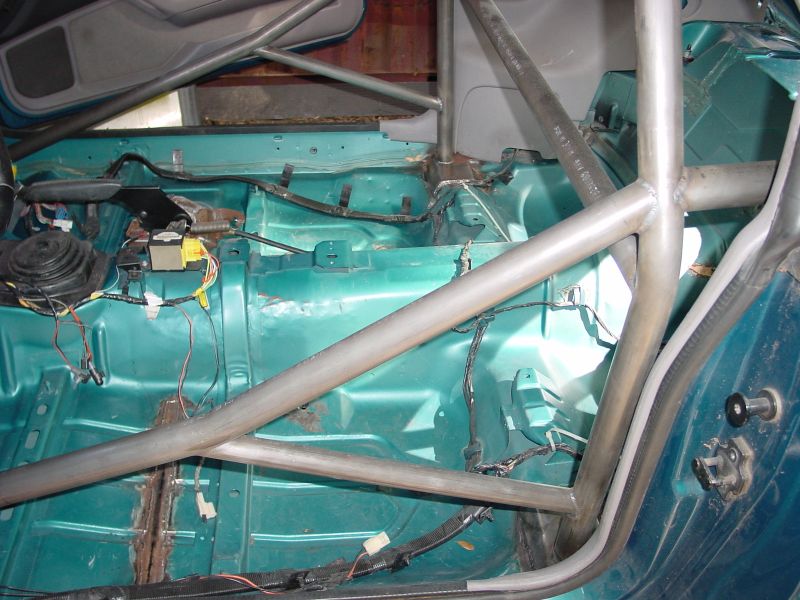
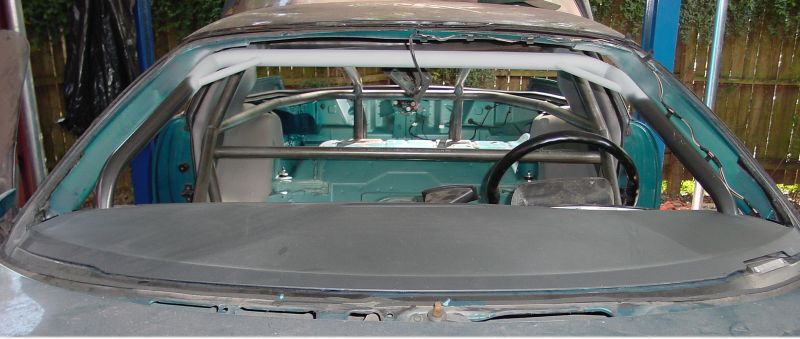
This update basically just shows some pictures of the
chrome moly rollcage once it was completed. Once the rollcage is painted
and a new headliner installed, we will reinstall the windshield and finish up
the interior.
|
|
|
|
|
|
|
Side bars were bent slightly for easier
entrance and braced on the backside. This design allows for a future updrade
to an X brace setup if ever needed.
|
|
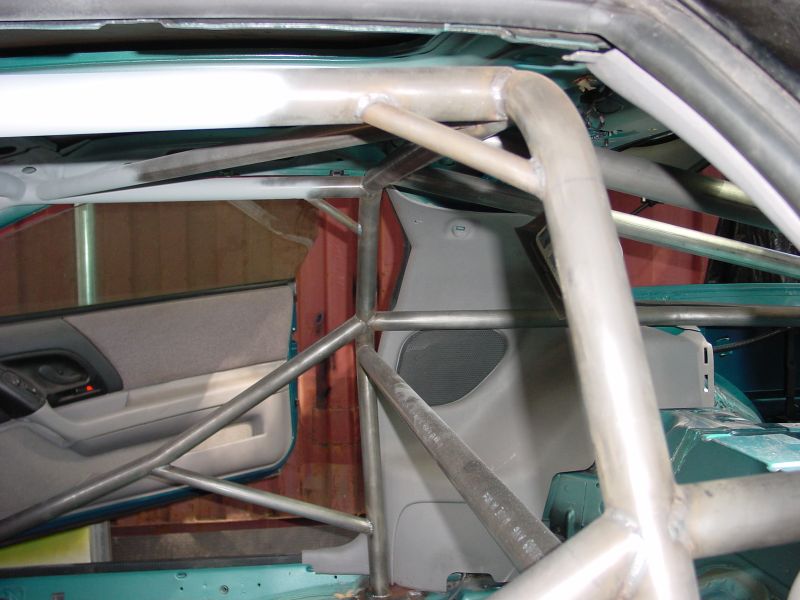
All corner joints were gusseted with
3/4" chrome moly tubing. Clearance above cage is where the headliner
goes. Once the headliner is installed, the cage is very "tight".
|
|
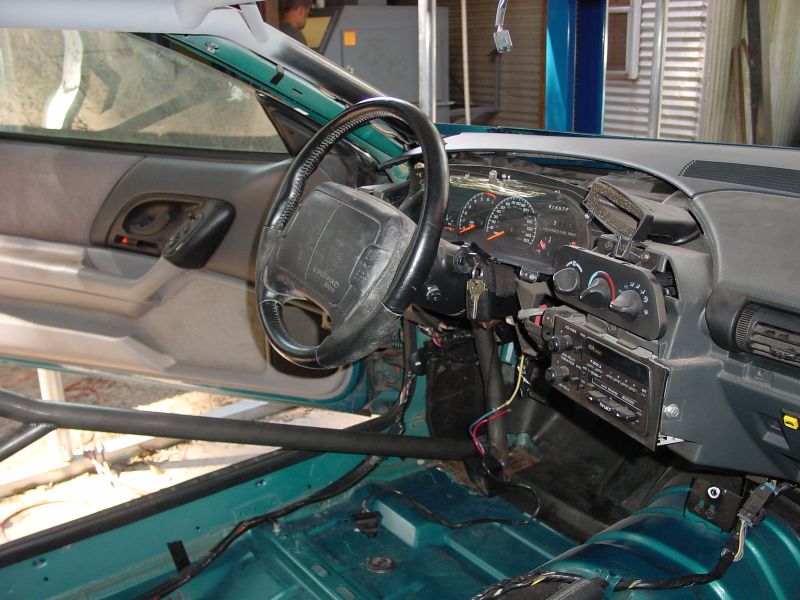
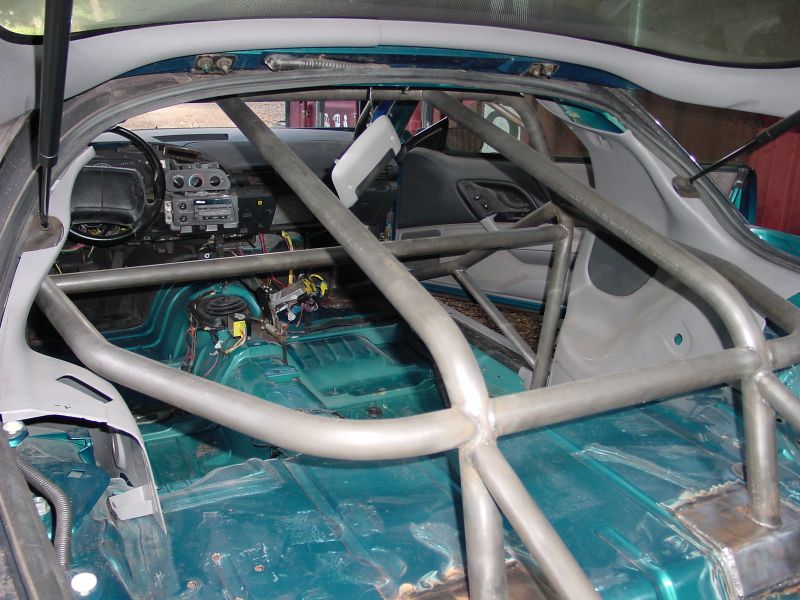
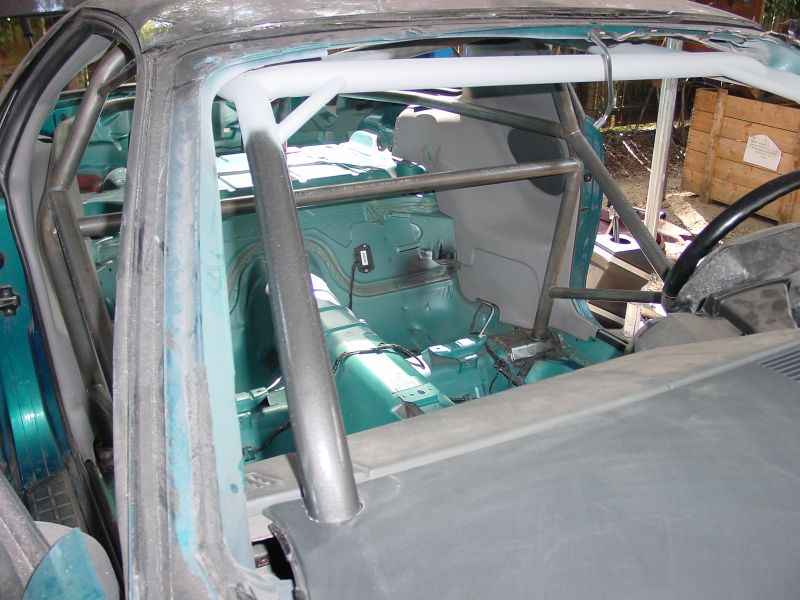
This image shows the pillar bars going
through the dash. This was by far the most difficult bar to fabricate
due to the compound bends required to follow the roofline, mimic the pillar
angle and go through the dash down to the floor.
|
| Click on any image above for a larger view. Most of these images are just
various angles of the finished cage. The picture to the far right shows
a closeup of the pillar bar going through the dash. In the next update,
the car will have the full interior installed complete with new carpet,
new headliner and all factory power accessories(power seats, locks, and
windows). |
November
26th
We are waiting for a few accessories to arrive so we have decided to do a non-interior
update this time and get back to the interior once we have everything we need
to finish. Since the car is only getting heavier with all the new suspension
and rollcage, we decided to start looking for areas to save some weight. The
only weight lost so far is in the removal of the air conditioning, ECM and factory
engine harness, and replacing the rear brakes with a Wilwood brake kit.
We will be running a tubular K-member and tubular A-arms up front as well as
Hal coilover shocks which will hopefully drop another 50 lbs. or so, that will
be a future update. The installation of our suspension didn't add too much weight(about
24 lbs. total including the subframe connectors)since it mostly replaced existing
pieces, however the Moser 9 Inch added 38lbs by itself. While installing the
chrome moly rollcage, each bar was weighed before installing and the total weight
ended up being 72 lbs. So far this is where we stand on documented weight:
|
Weight Lost
|
|
Weight Gained
|
| A/C removal - |
70 lbs. |
|
Suspension and chassis - |
24 lbs. |
| Replace stock ECM and harness with Speed Pro kit - |
5 lbs. |
|
Rollcage - |
72 lbs. |
| Replaced stock rear brakes with Wilwood Brake kit - |
12 lbs. |
|
Ford 9" - |
38 lbs. |
| Total saved so far - |
87 lbs. |
|
Total gained so far - |
134 lbs. |
So far we are already 47 lbs. heavier than stock but that should be offset
by the tubular k-member and A-arms. We still have a heavy turbo, intercooler
and lines to add not to mention all the intake and exhaust plumbing for
the turbo. Our goal is to try and be as close to the stock weight of 3350
lbs. as possible so we have our work cut out for us.
|
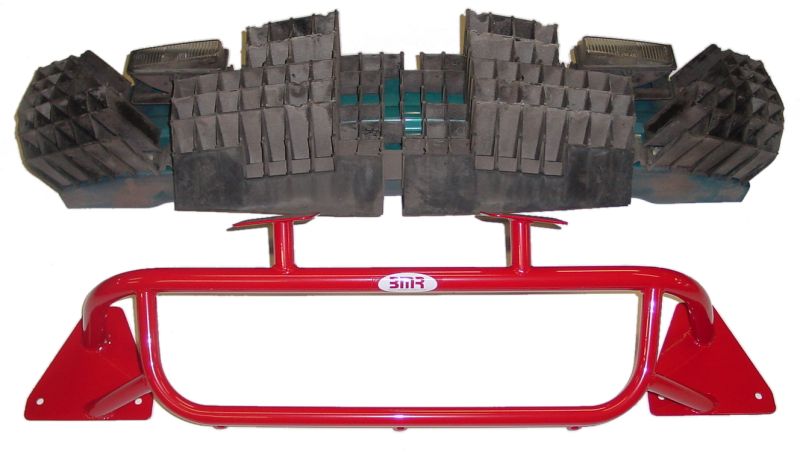
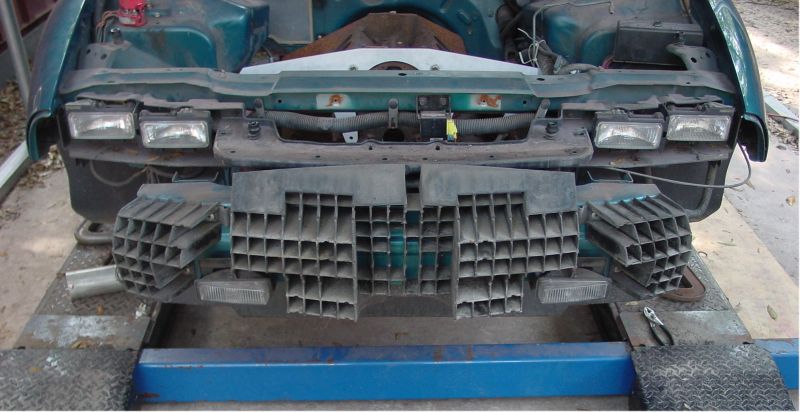
| One thing we noticed was how heavy the front bumper was so we decided
to remove it and weigh it - 27.25 lbs! Since this is on the extreme nose
of the car, reducing it's weight yields two benefits: easier weight transfer
and less overall weight. |
|
|
|
|
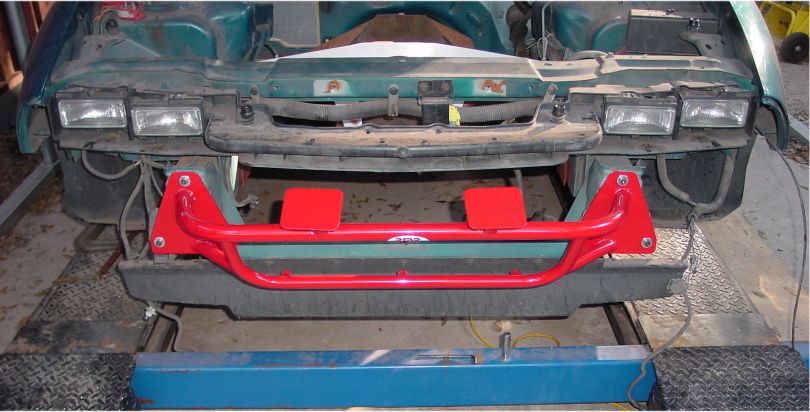
There really isn't a way to remove the bumper entirely since
the nose bolts to it in various areas. Also the plastic impact strips serve
as a support for the soft rubber nose assembly to keep it from collapsing
at high MPH. This made it necesarry to fabricate a tubular version with
the supports and mounts for the plastic. Using chrome moly tubing, we ended
up saving 18.75 lbs. |
|
|
These pictures illustrate the mounting and position
of the tubular bumper as compared to stock.
|
|
There will be future weight savings updates as we document each additional
step in the buildup.
December
22nd
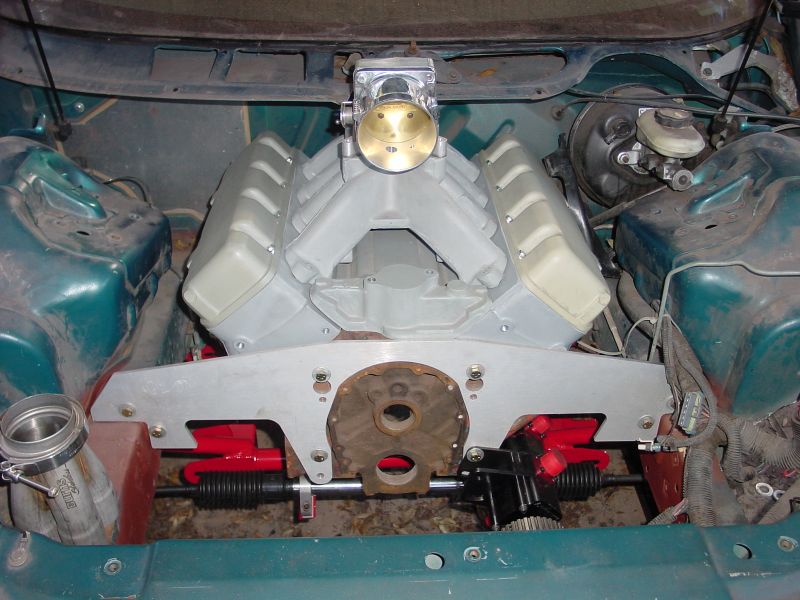
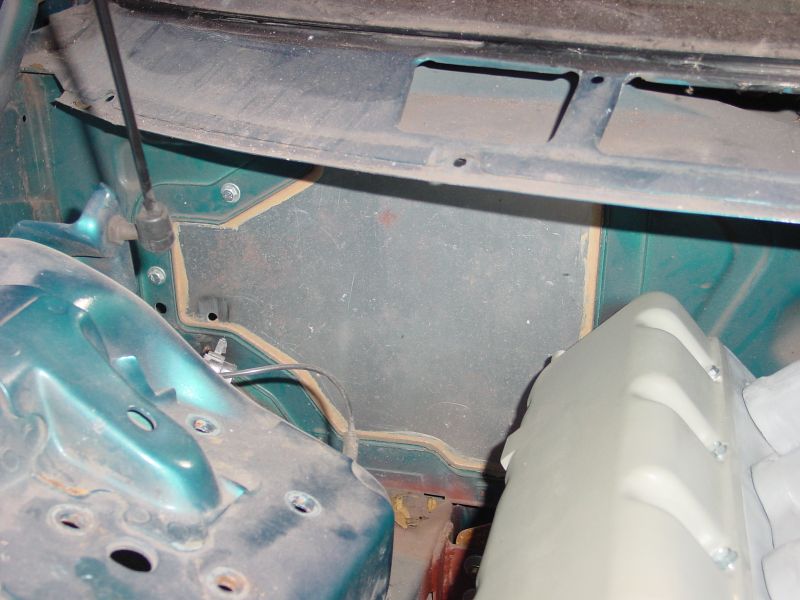
We are still a couple of months away from getting the motor out of the machine
shop(still waiting on custom parts to be made) but in the meantime I wanted
to get started on the turbo and intercooler mounting and get the stainless headers
built. With the limited engine bay room of the F-Body chassis, we anticipated
this as being the most difficult part of the buildup and wanted to get a head
start on it so that when the motor is ready, we can just drop it in a "semi-finished"
engine bay. In these images you can see a dummy block we are using to mock up
the engine. We also purchased a set of lightweight plastic heads and intake
from P-Ayr Products. These are great. They
are exact replicas of OEM engine parts right down to the threaded bolt holes.
Many chassis shops and a lot of Nascar teams use them for chassis building because
they are light and easy to move around. You can get anything from an old flathead
Ford motor to a new Cadillac Northstar. The ones pictures are GM's SB2 heads
and intake manifold.
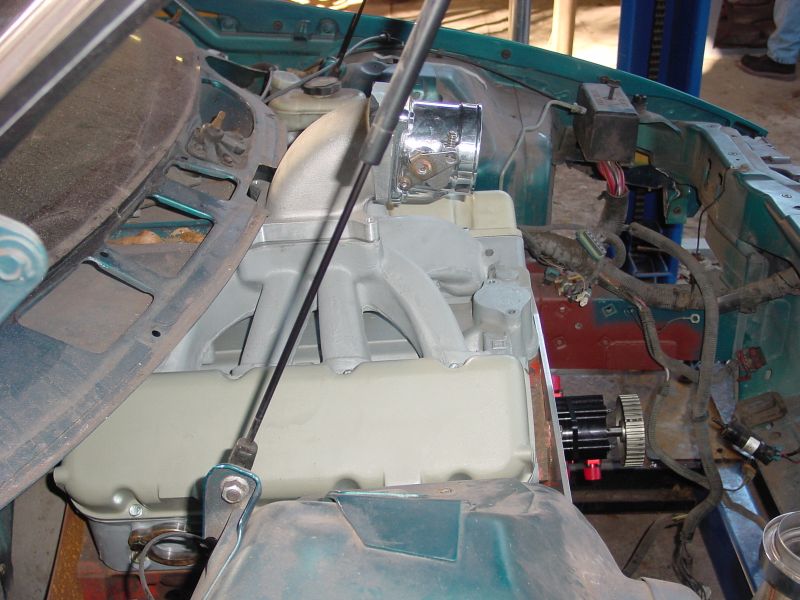
| In image 1 you can see the aluminum motor plate used for locating the
front of the engine. There is also a steel midplate in the rear that "sandwiches"
between the motor and transmission. Slightly visible in this image you can
also see the prototype BMR k-member with a Pinto manual rack-n-pinion. The
k-members are still scheduled for avilability in mid to late January. Image
2 shows the modified cowl area required to clear the tall intake manifold
and elbow. After a little trimming, all the stock windshield cowl plastic
still fits(wish I could say that about the hood). Image 3 shows the air
conditioning delete plate. Once the air was removed, an aluminum panel was
fabricated and bolted to the stock holes then seam sealed. |
GO TO PAGE 1
- 2 - 3 - 4
- 5 - 6 - 7
- 8 - 9