BMR 9 SECOND PROJECT GTO BUILDUP - PAGE 3
1-2-3-4-5
May 2004
By now we were smitten with the horsepower bug. It was obvious that the stock
motor would only take so much nitrous and we wanted to go much faster so plans
were started to build a new motor. After scaling the car at the last race and
finding out it weighed over 2 tons now, we decided that more cubic inches were
in order. Our first plans were to purchase a pre-built motor from one of our
distributors such as MTI
, Thunder Racing,
or AP Engineering
but everybody we called were 2-3 months backordered so in the end we decided
to build it ourselves. An iron block was ordered from GMPartsDirect.com
and a Lunati
4" forged stroker crank from LS1Speed.com.
We also ordered a set of Carillo
"on center" billet connecting rods. This combination, when bored .030"
over, produces 408 cubic inches and should easily be capable of supporting 1000hp.
|
Up until now our goal was to get the car solidly into the 10's without
compromising drivability. After running mid 11's with a stock internal
motor, the new goal became low 10's. In order to get a 4000 lb car into
the low 10's it takes about 750 rear wheel horsepower so we knew that
the motor would have to make at least 450-500 on it's own.
Knowing this, we knew we would have to address the stock fuel system
before we could ever install this motor. The OE pump is only capable of
supporting between 400-450 peak horsepower according to the Australian
Monaro forums and we didn't want to test this data firsthand. Since we
were waiting on parts anyway, the fuel tank was removed. The stock pump
was removed from the tank as well as the pickup assembly. At the stock
pickup location that protrudes through the trunk floor, we welded a -10
AN fitting. This became our primary fuel pickup and we used the factory
pickup as our return line.
|
 |
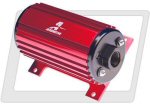 |
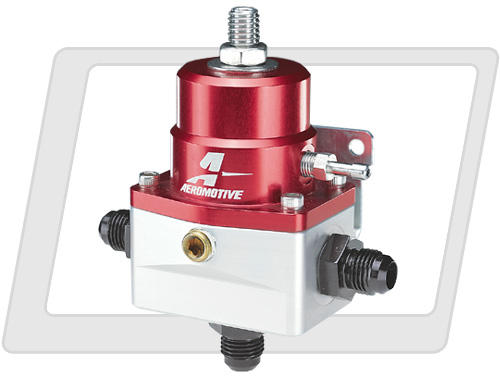
An Aeromotive
A1000 fuel pump, A1000 regulator and -10 filter was ordered to handle the
fuel delivery. This system is rated to handle up to 1600 hp which is completely
overkill but these pumps are insulated well for durability and are suprisingly
affordable. |
 |
|
|
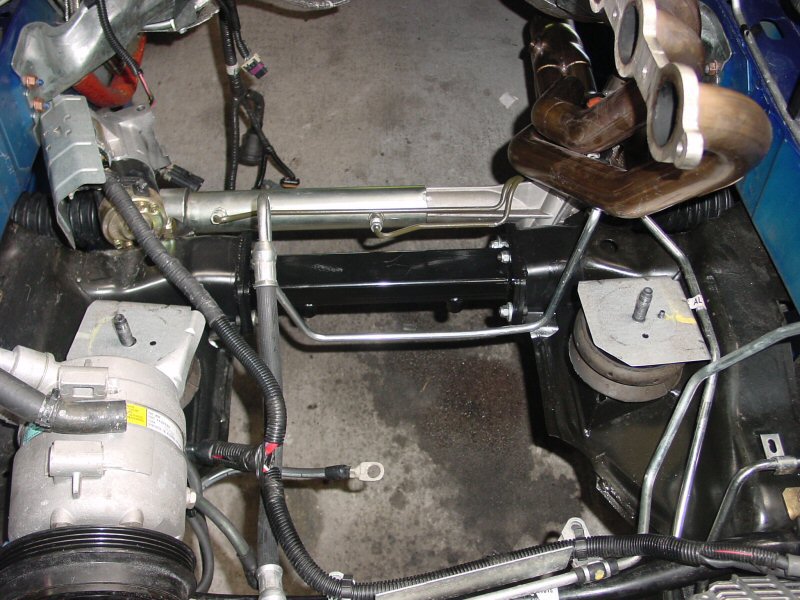
While we were trying to locate a spot for the fuel pump, our Stainless
Works headers and 3" exhaust arrived. The timing could not be
more perfect. The exhaust uses chambered mufflers that are much smaller
in diameter than the factory mufflers. This allowed us to make a bracket
under the passenger side rear seat to mount the fuel pump and filter.
A braided -8 line was then run from the pump to the engine bay.
The headers and exhaust are top quality pieces. This is the first we
have used this brand and I can't imagine anything better. If all goes
well, they should add about 30-40 horsepower dropping us down into the
low 11's.
|
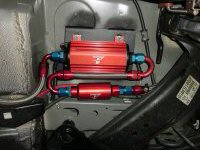
| This image shows the fuel pump and filter mounted under the
passenger rear seat. Generally you would not want to use any 180 degree
fittings in a fuel system but space limitations made it necessary in this
case. Our line size and fuel pump capabilities far exceed our requirements
anyway so it will be fine in this case. |
 |
 |
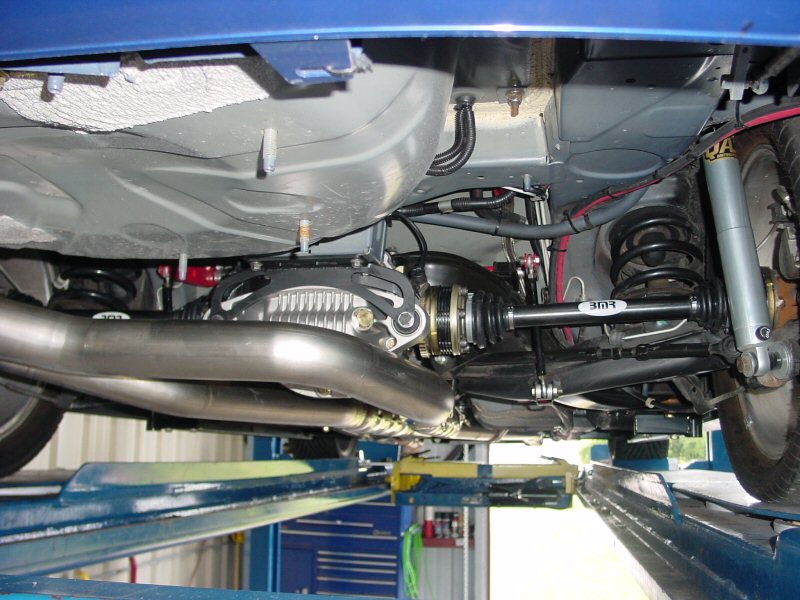
Since the exhaust was already off the car, we decided to install
one of Harrop's
differential covers at this time. This is another very nice piece that should
have come factory on this car. Not only does it provide more gear oil capacity
but it also has a much better rear mount incorporated into the cover. This
will help stabilize the whole cradle since this mount doubles as the rear
cradle mount too. |
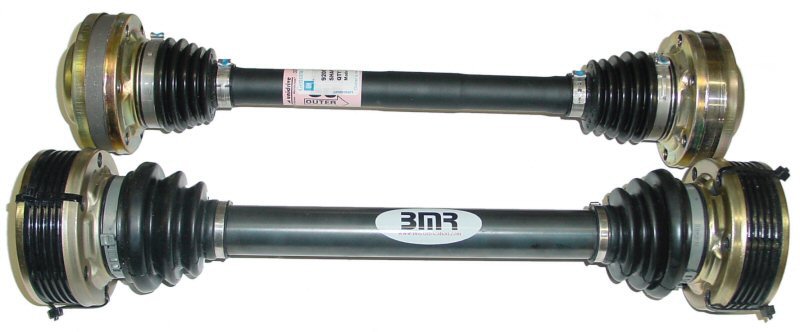
| In preperation for the new motor, we installed a set of BMR
300M billet stub axles and CV shafts while we were changing the rear cover.
Up until this point I think we were lucky that a CV hadn't failed. Typically
CV's will fail on these cars once 60 ft/times get below 1.60 and our car
is much heavier than it was originally. In the image to the right you can
see how much beefier the BMR axles are over the OE unit. Besides the larger
diameter shaft, the CV cages are machined from billet making this setup
good to 1000hp. |
|
|
|
It's tight but the Stainless Works exhaust clears the
new Harrop cover.
|
|
June 2004
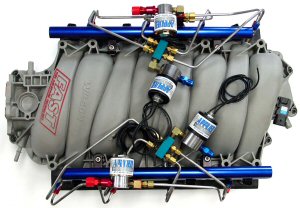 |
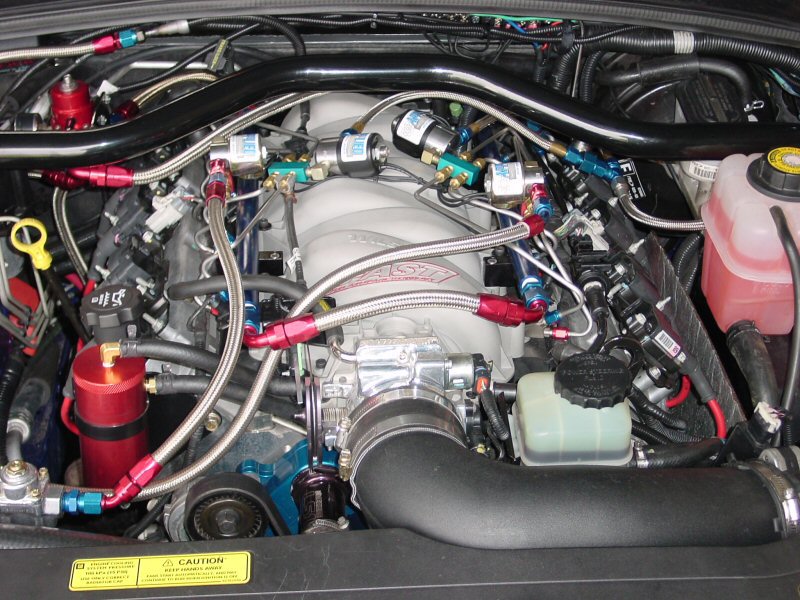
One of the pieces ordered for the new motor was one of the new FAST
intake manifolds. We decided to step up the nitrous system with the more
conventional fogger nozzles, replacing the original NXL nozzles used on
the factory intake. Once again Jeff Prock from Applied
Nitrous Technology was called on to plumb the intake. The new system
is a work of art and we were hoping it performed as well as it looked.
A set of billet fuel rails and 42 lb/hr injectors was ordered from LS1Speed.com
and installed on the new intake.
|
While the intake was being plumbed, we received our Stage 3 LS6
ported heads from CNC Cylinder
Heads. These heads come with Manley 2.05"Int/1.6"Ex stainless
valves, valve springs, locks and retainers installed. Rumor has it that they
flow a little over 300@.600 lift. With our custom BRC
pistons and these heads, compression was calculated to be 11.4:1.
We also ordered a set of Comp
Cams roller rockers, lifters, and a custom ground Comp nitrous cam. Since
the car is so heavy and we wanted to keep the streetability, the cam was kept
somewhat consevative with a .595/.601 lift and 232Int/236Ex @ .050. The cam
was ground on a 113 centerline.
July 2004
|
|
While the new shortblock was being machined and we were waiting for more
engine parts to arrive, we decided to bolt the new intake onto the stock
motor. With a better fuel system, new intake, headers, exhaust, a different
nitrous system and stronger rearend components we wanted to see if we
could get some low 11's out of the car with a mild nitrous tune.
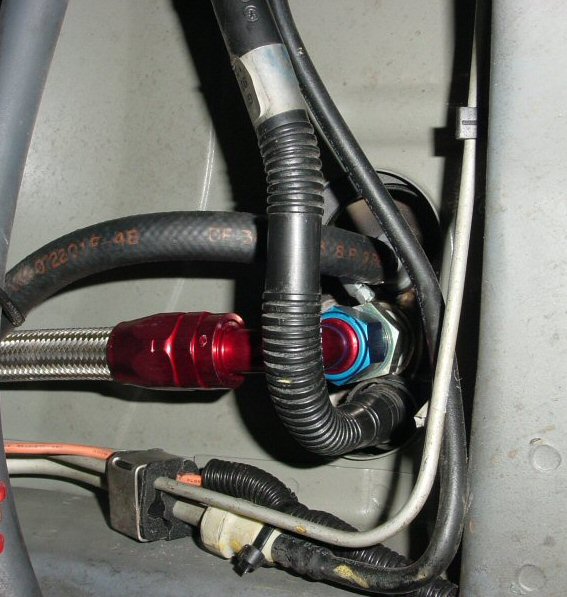
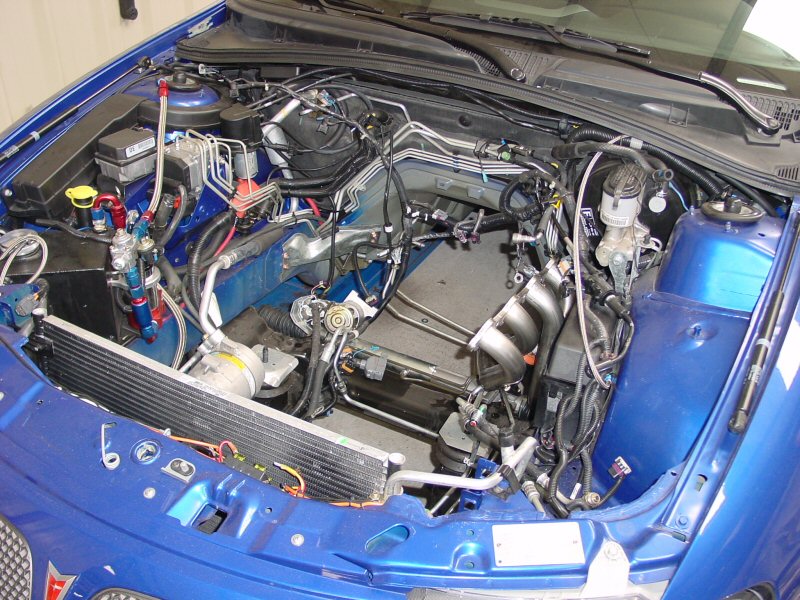
Once the manifold was installed, a BMR shocktower brace was modified
to attach our fuel pressure regulator to. With the new fuel system now
complete, we headed back over to Rev Xtreme to dyno tune the motor again.
After about 10 motor pulls and computer adjustments we made 342.8 RWHP,
an improvement of 44 horsepower to the rear wheels since our last NA dyno
tune. A stripped fitting prevented us from dynoing the nitrous sytem.
|
With the car making more power now and the fitting replaced we
headed to the track. Since we didn't have the opportunity to dyno tune the car
with the new nitrous system installed, we jetted it conservatively and checked
the plugs after each run. The entire nitrous system was flowed by Jeff Prock
and he provided a jet chart based off his flow figures. With the smallest jets
installed and a little too much fuel pressure (to be extra safe), our first
pass down the strip got us an 11.44@119mph with a 1.67 60 ft.
We were thrilled and decided at this point to jet it up a little and leave the
fuel pressure high. We also dialed in a total of 6 degrees retard on the timing
tuner. Our efforts payed off with an 11.23@121.67mph and a 1.63 60
ft. At this point we started to wonder if the car could possibly run a high
10 with a bone stock motor and nitrous. Leaving the jetting alone, we decided
to change the activation rpm to 3200 and see what happened. Unfortunately during
the burnout, the car got sideways and one wheel went up in smoke. The posi unit
was toast and the car would not hook up no matter what we did, our track day
was over
August 2004
After this last trip to the track, we contemplated purchasing
a KAAZ differential for
the rearend. The factory posi would probably hold up if the car was kept straight
during the burnout but it just seemed pointless putting a stock part back in
it knowing the car was only going to get faster. After learning that a new posi
could not be purchased from Pontiac without buying the entire differential,
the KAAZ posi suddenly
seemed to be the only choice. The other option was the ultra high dollar Harrop
9" IRS. Since this was out of the question, a few people were called and
we learned of a new Ford 9" replacement differential being offered by Diff
Technics. This unit is very comparable to the Harrop differential except
much more affordable. Affordable meaning still expensive but not 1/3rd the price
of the car. Needless to say we ordered one. The kit comes with the housing,
axles and axle bearings. We ordered the gear, Detroit Locker, pinion support,
pinion flange, and the rest of the bearings from Moser
Engineering.
With the new motor still 3-4 weeks from completion and the new
rear 8 weeks out, it looked like the car was going to sit for a while. On a
longshot, we removed the posi unit and decided to do the backyard hot rodders
trick of welding up the spider gears so we could get the car back to the track
and run that 10 second et. A few bolts were wedged in between the spider gears
and then the whole thing was TIG welded together in various places - walah,
el cheapo spool!
We headed back to the track that weekend not knowing what to expect.
This time the car was trailered just in case the rear let go. With all of the
nitrous settings left as they were, we made a pass right off the trailer. 10.986@125.19mph!
We couldn't believe it, 10's with a stock motor and 4000 lbs. At that point
we should have went home but we decided to make one more run. Leaving the line,
it was obvious something was wrong and the car felt weak all the way down the
track. The car looked like a mosquito fogger coming back in to the pits and
was barely running. It had still run an 11.26@118mph but something was
definitely wrong.
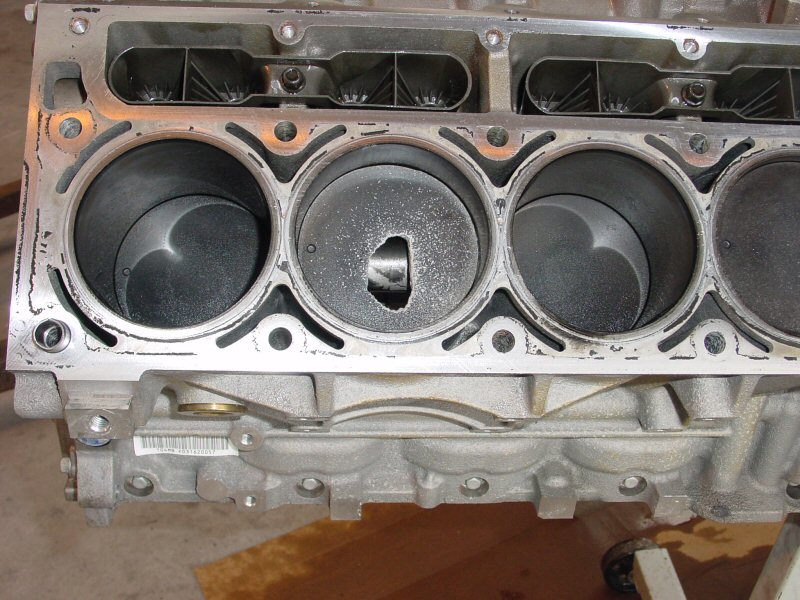
| We got the car back and took it apart. The first thing we
noticed was the aluminum in the oil pan and on the pickup assembly. The
second problem noticed was the spark plugs in number 5 and 6 cylinders had
no electrodes. Once the heads were pulled off, you could see the big hole
in the number 6 piston. Apparently things got a little too hot. We're not
sure if this was due to detonation or we finally just reached the limitations
of the factory hypereutectic pistons. Either way we were not going racing
again until the new motor was installed. |
|
| |
Up until now we had been running a single nitrous bottle and carrying
2 or 3 extra bottles to the track. Even with our BMR
nitrous quick disconnects, it's still a pain to switch out bottles
every 2-3 passes plus the new motor would be taking even more nitrous
so we decided to make a dual bottle mount. It was designed to fit inside
the spare tire well and it can easily be removed by simply loosening the
factory spare tire wing bolt.
We also installed twin bottle heaters connected through a relay to a
modified NX
Fire and Ice controller to regulate heat and pressure. Our modified system
works much quicker than the heater that came with the kit. We used the
controller and the pressure sensor from the kit, discarded the heater
and used two traditional bottle heaters connected through a relay. The
pressure sensor is monitored by the controller which turns off the heaters
when the bottles reach 1050 psi. The controller constantly monitors the
pressure and turns the heaters on and off automatically to maintain optimum
pressure. The system works flawlessly and really should be an NX part
number.
|
|
|
With the motor out of the car we decided to modify the stock
K-member to make the center removeable. This will allow us to remove the
oil pan without pulling the motor. The center was cut out and plated and
a 1.5" x 2" tubular center section was fabricated that bolts into
place. The result to the right almost looks factory. |
|
|
|
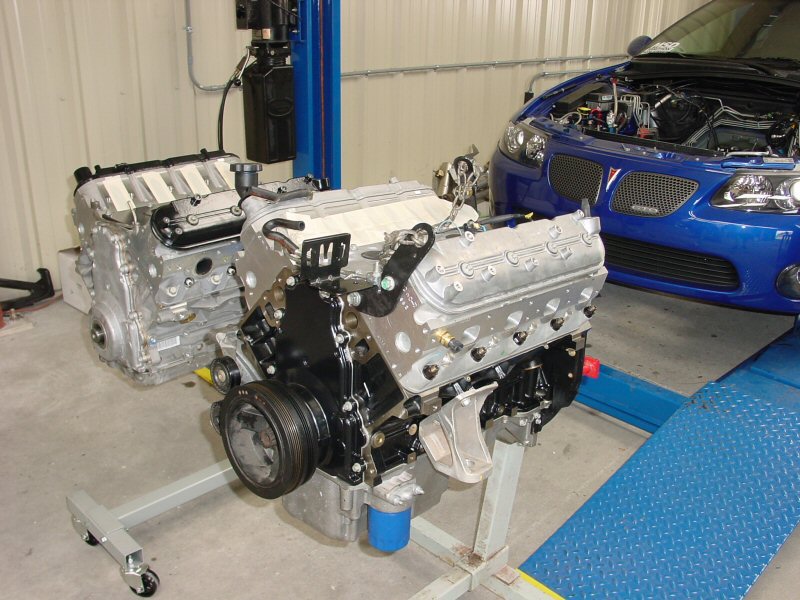
Here you can see the new motor awaiting final assembly. The
original motor is in the background while it is picked clean of sensors,
plugs, and miscellaneous covers and fasteners. In this image you can see
the Comp Cams roller rockers that required machining the valve covers for
clearance (shown below). |
| We had to clearance all of the high spots on the inside of
the valvecover to make room for the roller rockers. Each of the protrusions
are the bottom of the coil bracket bolt holes. Machining the bottom off
of each one opens up a hole that will require siliconed threads to prevent
leaking. No biggie, the alternatives are valve cover spacers or aftermarket
tall valve covers. |
|
|
|
1-2-3-4-5