BMR 9 SECOND PROJECT GTO BUILDUP - PAGE 2
March 2004 Continued
|
The very first thing that should be done to any uni-body car is the installation of weld-in subframe connectors. By tying the front and rear subframes together to make a more rigid platform, the suspension can do it's job more efficiently. Since subframe connectors minimize body flex, they also help prevent creaks and rattles, seam misalignment and other annoying problems that occur down the road. BMR subframe connectors tie into 5 seperate structural areas of the subframe assembly, including the rear cradle mounting area. |
 |
 |
 |
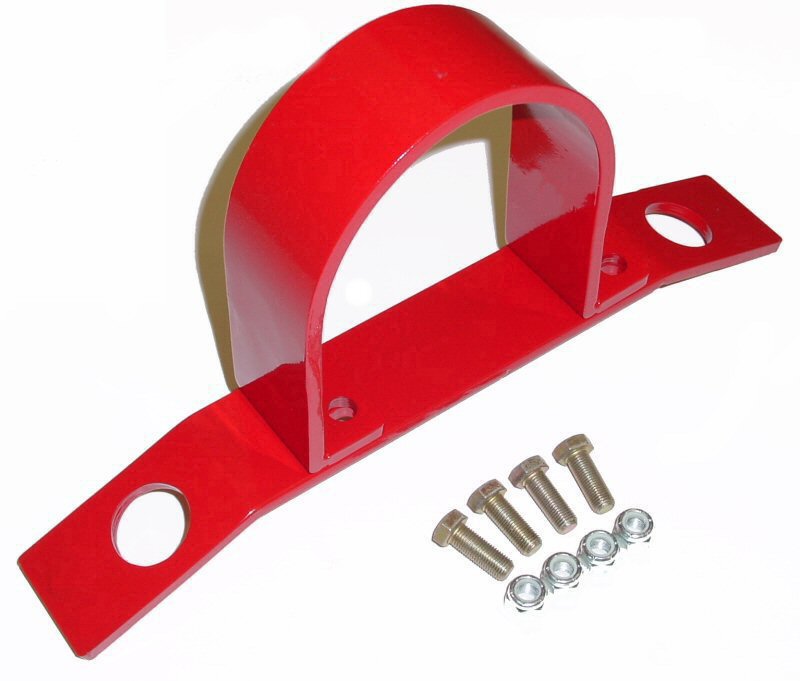
| With the suspension loaded, all weld areas were ground to bare metal and the subframe connectors positioned into place. Once the subframe connectors were installed, we decided to weld in a BMR driveshaft safety loop while the welder and other tools were already in use. |
 |
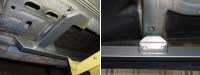
As you can see in the picture to the right, the factory driveshaft is pitifully small. Not only that but it uses large rubber joints at each end instead of u-joints. Since the last thing we want to do is fling a driveshaft out at the drag strip we installed our BMR HD driveshaft. This shaft is manufactured with a Mark Williams billet front yoke and a CNC machined rear adaptor yoke. |
 |
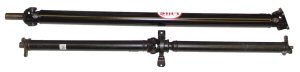 |
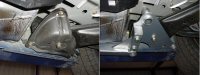
As you can tell in this comparison, the driveshaft is substantially bigger and requires modification of the passenger side muffler to provide the proper clearance. Beyond this modification, it is a bolt-in design. |
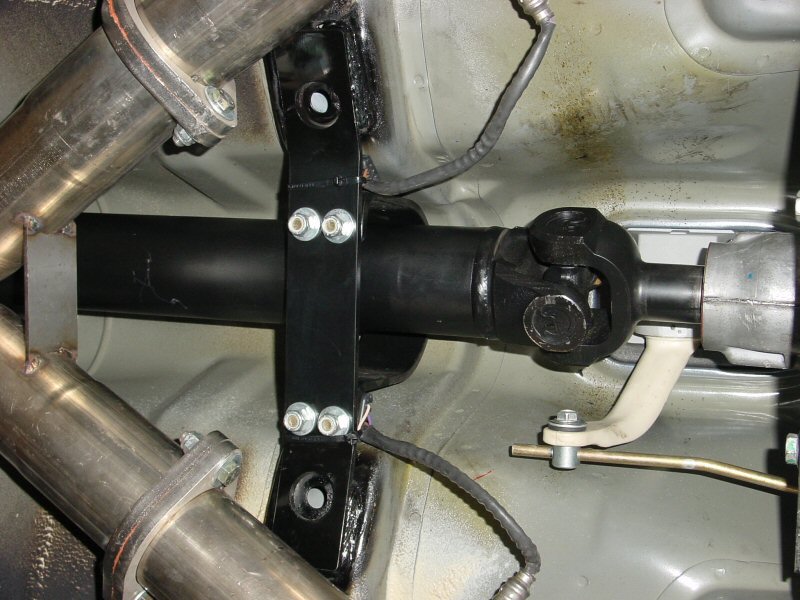
| In the first image to the right, you can see how much larger the rear BMR pinion flange is than the factory flange. This adaptor converts the Australian splines of the pinion to a Spicer 1350 series u-joint flange. If you compare the second image at the right to the driveshaft loop image above right, it is immediately noticeable how much larger the driveshaft is. |
 |
 |
 |
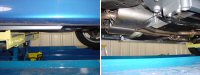
We also installed a BMR skidgaurd while the car was up in the air. This gaurd replaces the heavy factory gaurd and saves 10 lbs. over the OE unit. |
|
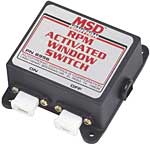
Before heading back to the track, we installed one of MSD's window switches to activate the nitrous. This little box comes with various rpm modules that activate the nitrous at the corresponding rpm. We set it up initially to come on at 3800 rpm. When we arrived at the track, it was a humid, 95 degree day but the track was prepped well. Our first run yielded an 11.83@115.5mph - yeahh! The car felt good all the way down the track and didn't show any signs of spinning off the line so we decided to change the MSD pill to 3200 and see what happens. On this run, the tires went up in smoke so we put the 3400 rpm pill in and went back to the starting line. After a huge burnout, the car dead hooked and ran an 11.76@116.8mph. We followed that up with an 11.73@116.76mph. Our 60 ft times were all in the 1.69-1.71 range with all 3 runs. |
 |
April 2004
| With the car running solid 11's, we decided we wanted to have a little more fun and enter it in the next Edelbrock Pro Race. Since this is an NHRA sanctioned event, it would be necessary to update the car to pass tech. To run in the 11's legally, the car must have a rollbar, driveshaft safety loop, and battery disconnect. With the proper protective clothing and helmet, this combination is actually legal to 10.0 in the quarter. With the race only 3 weeks away, we knew it would be tough to get the car ready in time but possible. At this time we also removed the torque converter and sent it back to Precision Industries to have it loosened up to 3500 stall. |  |
 |
 |
 |
 |
 |
|
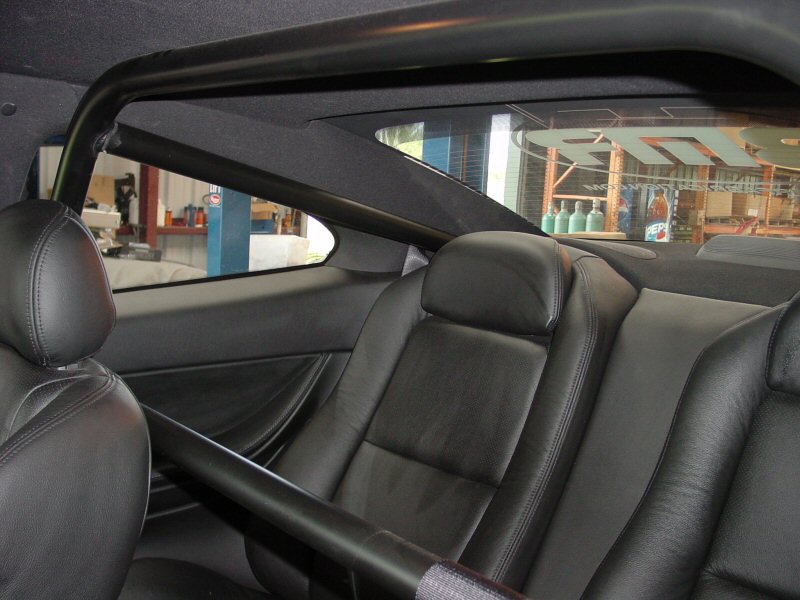
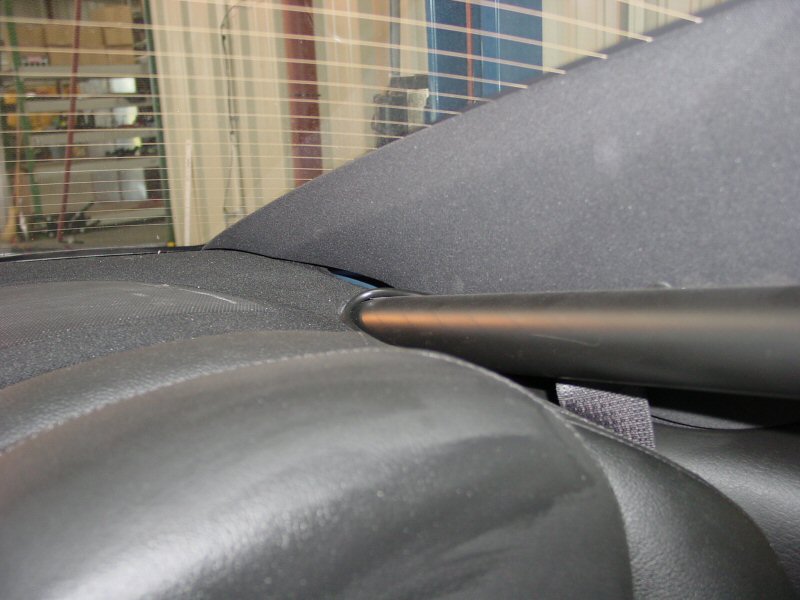
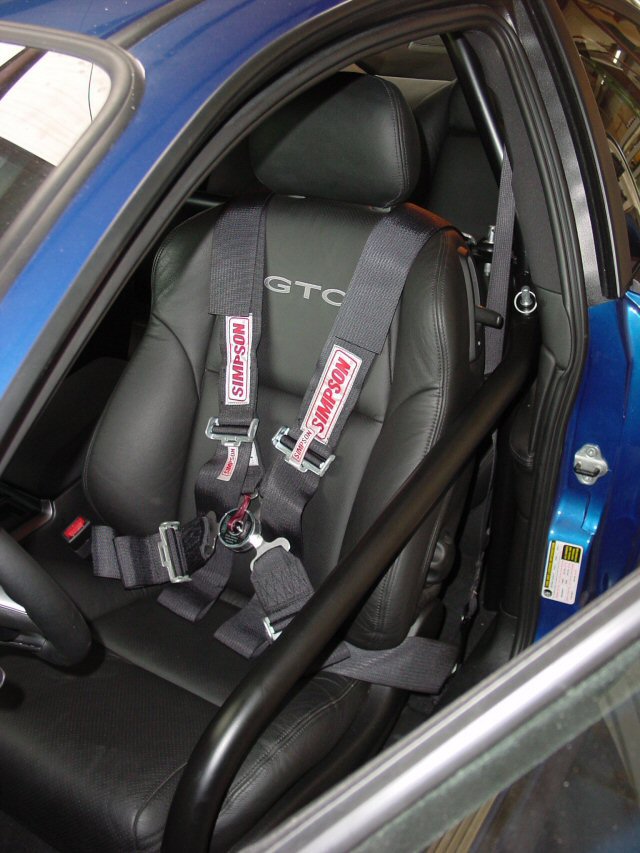
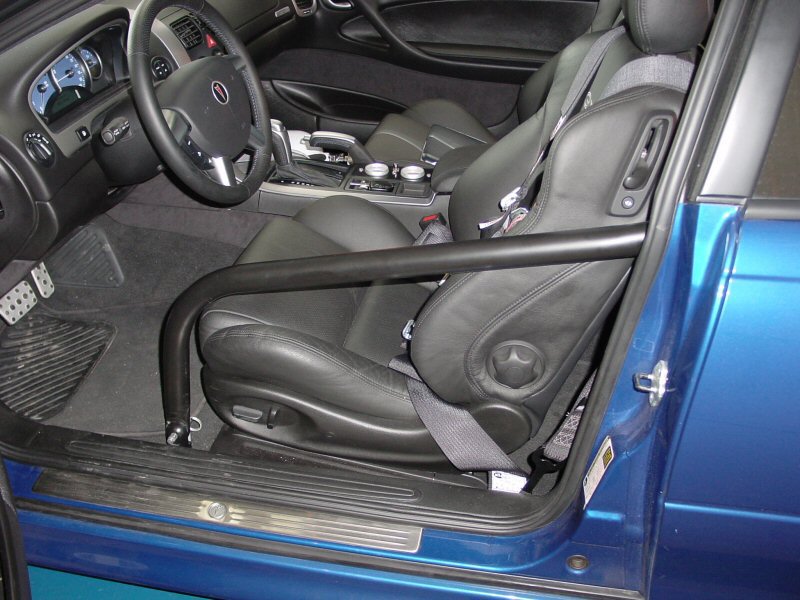
The first thing we did is order forty feet of 1.75" x .083" 4130 chromoly tubing and a Simpson Camlock 5 way harness. The entire interior was removed to provide access to the floorpan. We also removed the fuel tank and all of the trunk panels. Once a design was established, NHRA legal 6" x 6" weld plates were welded to the floorpan at the proper points. The main hoop attaches to the floorpan directly above the subframe connector weld point along the rocker panel. The rear bars go through the package tray, around the fuel tank and onto the wheel tubs. The drivers side door bar crosses the drivers shoulder midway (to be legal) and then connects to the floorpan directly in front of the drivers seat to allow easy entry. Since this is primarily a street car, the door bar and main hoop crossbrace were fabricated with Chassisworks quick pin attachments to allow easy installation at the track. Once removed, it is still possible to use the rear seat. The lap belt portion of the 5 point harness is attached to the stock seat belt mounts on the floorpan along with the factory belts and the shoulder harness attaches to the removeable crossbrace. This allows the convenient factory seat belts to be used for street driving. When not is use the safety harness flips back to the rear passenger footwell. |
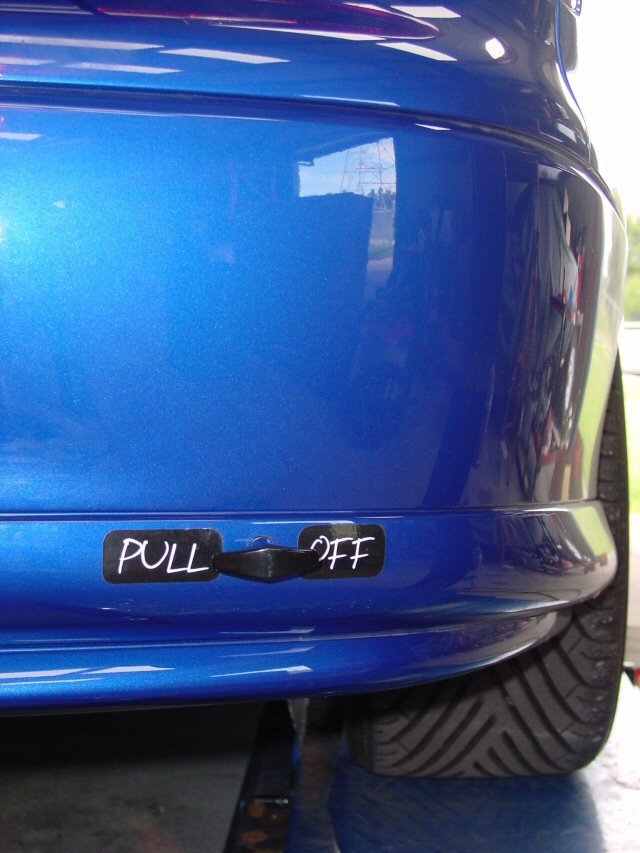 |
Since the battery was already in the trunk, it was fairly simple to install a quick disconnect switch. We purchased a Flaming River disconenct switch from Jegs High Performance and fabricated a mount for it. It was attached to the frame rail on the passenger side and the handle protrudes through the bumper. In the meantime our torque converter came back and was reinstaled in the car. |
 |
|
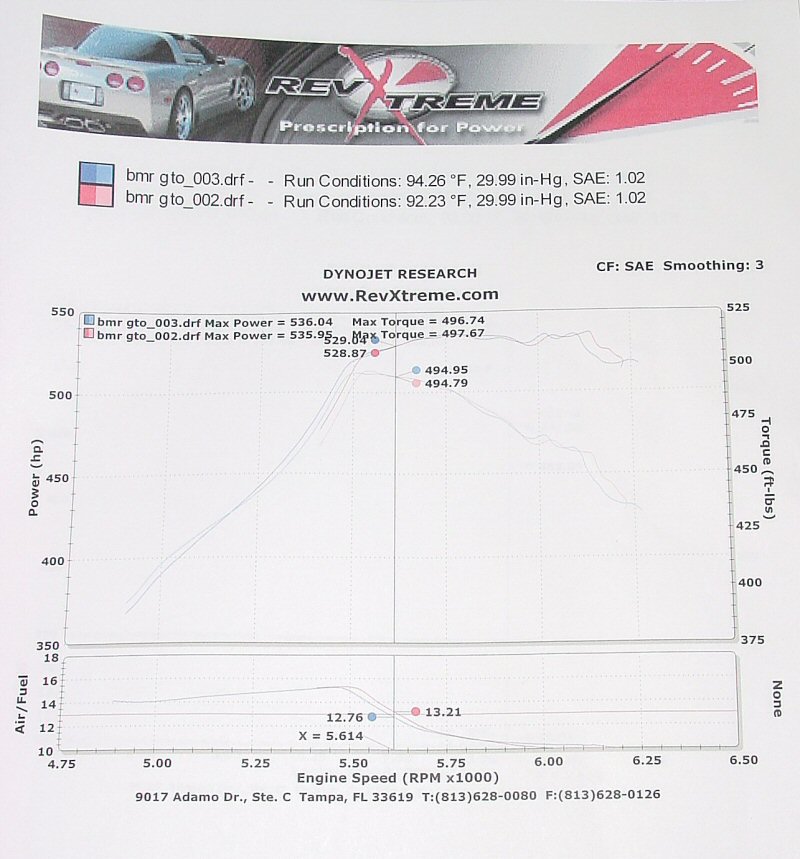
With a week to spare we decided to step up the nitrous a little. The only class we could possibly be competitive in was MSD True Street which is a bracket class divided into 5 seperate classes, 10, 11, 12, 13, 14, and 15 second cars. Each car is allowed 3 runs which are then averaged. The car with quickest average in their field wins. Since 11.7's isn't very competitive in an 11 second field we knew it would be necessary to run low 11's if we were to have any chance at all. The nitrous jets were stepped up again and the timing retarded another 2 degrees. We also added 100 octane race gas to our dedicated fuel cell and went down one more heat range on the plugs. We took the car back up to Rev Xtreme to dyno tune it and more importantly make sure the air fuel ratio was safe when the nitrous was activated. On the first dyno pull, the car was a little rich but made 528 RWHP and 494 RWTQ. Not bad considering it was still hot from driving it up there. With a few more tweaks and 3 more dyno pulls, we had it up to 536 RWHP and 497 RWTQ. By our calculations, we expected 11.40's with this combination. Maybe not enough to win the race but at least we could be more competive this way and the tune was still pretty safe.. |
 |
Since the car was making so much more power and the converter stall speed was raised another 1000 rpm, we were afraid of the drag radials so at the last moment we swapped them out with a set of Mickey Thompson 26x11.5x17 ET Streets. Without any test time, we headed to the track for the big race. The track was packed but our class was small with only about 10 entrants. On the first qualifying run, the new MT's went up in smoke and we just coasted down the track. We decided to do a longer burnout on the next run but after a burnout that would make a Top Fueler proud, the tires still spun a little. With a pathetic 1.88 60 ft, the car still ran an 11.53@121.3mph! It was obvious that the car was making more power but we just were not getting it to the ground. With only one more qualifying run before the race, we put the BFG Drag Radials back on the car and went back out.
A good burnout yielded a respectable 1.69 60 ft/time with no wheelspin and the car ran 11.49@122.1mph. We were pretty happy with that although it was obvious that the car wasn't going to get much faster without a better 60 ft, more power, or both.
The car was required to complete a 30 mile cruise and then make 3 back-to-back runs without lifting the hood. The first two runs were fairly consistent with an 11.46 and an 11.53 but unfortunately too much excitement brought a red light on the third run and our day was over. We were a little dissappointed since that run brought our best 60 ft ever of 1.59 with no hint of tire spin! The bottle was low on pressure by this point so the car only ET'd a 11.56. With a fresh bottle and a duplicate 60 ft, it just might have 11.30's in it.